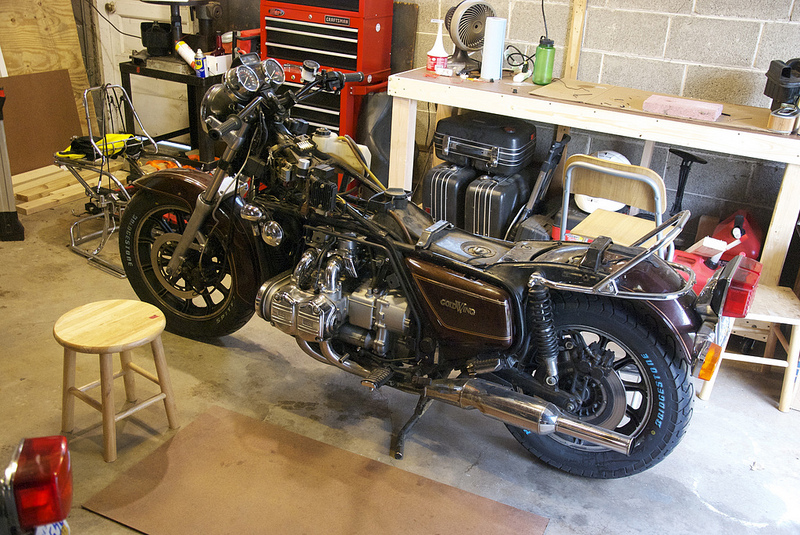
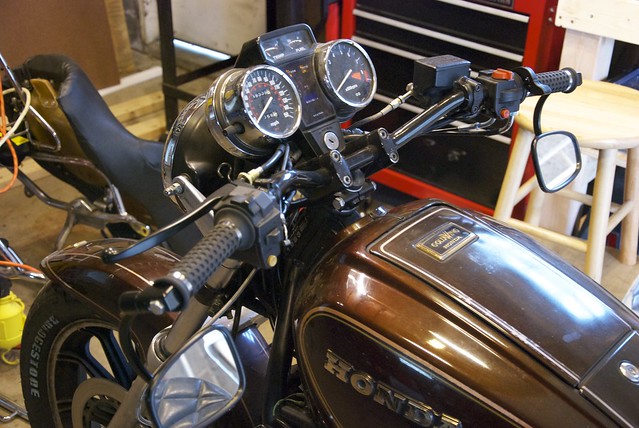
At this point, my home shop is about 50% set up, but it’s still allowing me to get a lot done. It’s become an inspiring, energizing place where problems get solved and motorcycles get fixed. After successfully buttoning up the CB750, I’ve turned my attention back to my GL1100. Late last season I’d swapped the handlebars on the GL for a black set of superbike bars. These gave me a much more aggressive riding position than the stock touring bars, but without making me lean way over for clip-ons or clubman bars. While pretty comfortable, they weren’t quite where I wanted to be on the bike.
I had other issues with the controls as well. First off, I’d routed my throttle cables incorrectly. Instead of routing around the front of the right fork then around the neck, I’d gone behind the front fork, then around the neck. This created a pinch point when the bars were turned all the way to the right. While moving the bike during the move from Minnesota, this pinch point had actually broken something in the throttle assembly, so I needed to pull that whole assembly apart and see what had happened. Furthermore, the old cables had enough friction in them that the throttle wasn’t snapping back closed when released. While not a huge deal, I wanted to see if I could sort that out while I had the bars apart.
Between eBay and Amazon, I procured all the parts I needed to get started on the new bars. The bars themselves are from Emgo, and include knurled channels to accept the bar clamps. You won’t find these on most Bikemaster bars, so it’s a nice upgrade. Original, duel clamps have replaced the ugly chrome block that came with the bike when I bought it. (Did someone actually think that was good looking?) Brand new control cables had also arrived, so with the naked bars in place, I fitted the grips and switches for reference and marked off the new length for the cables.
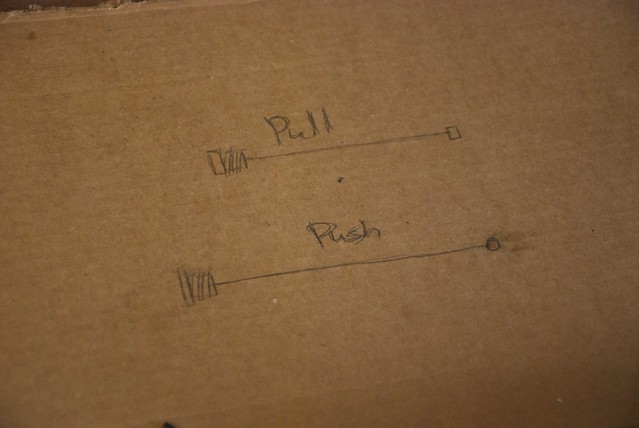
Making control cables isn’t very difficult. It’s not the exact length of the outer cable relative to the motorcycle that’s critical. What is critical is the difference between the length of the outer rubber cable and the inner woven steel cable. So long as your outer cable isn’t so short that the handlebars pull on it when turned, you’re fine, so long as the inner cable is the correct, longer length. The way to figure this out is to take the stock cable, pull the inner all the way to one end, then measure how much longer the inner cable is than the outer. Then, when you shorten the outer cable, this is the only measurement that matters. For this new set of throttle cables, I didn’t even need new crimp fittings for the outers. Just some careful cutting and filing and a bit of heat shrink tubing and I was in business. I was even able to un-solder and reuse the brass cable ends Jeff and I had created for the previous cables.
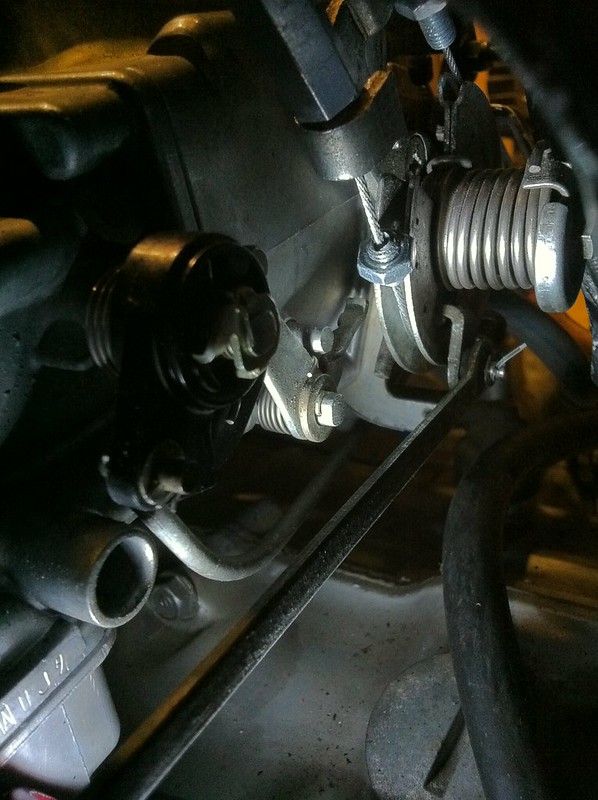
The only trouble I had, however, was when I was hooking up my new cables. After fighting with the pull cable for half an hour, I finally got the push cable in place. While tightening up the bolt, it snapped in half. It was probably a casting defect in the bolt itself, but if left me utterly speechless. I just stared at it, mouth agape for at least 30 seconds. New parts aren’t supposed to break. Nothing for it though, I had to order and shorten another push cable.
Recreational Mechanic’s Tip: After years of struggling with throttle cables, I’ve finally cracked the code. The order is everything. Install the pull cable first, then the push. Otherwise the cables will fight you the whole time and you’re a lot more likely to bugger up your cable and lead to future breakage.
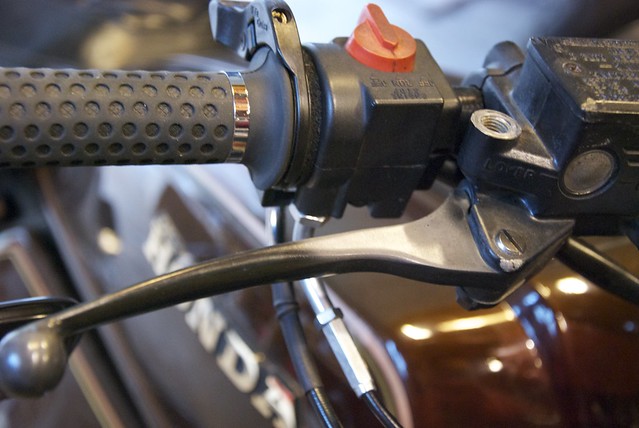
I’d also ordered a new clutch cable, as I figured that these new, slightly taller, longer bars would require a longer reach than the cable’s current length. Trouble was, I couldn’t check to see if that cable length was right or not. The OEM clutch perch’s pinch fitting wouldn’t quite slide over the new 7/8″ bars because of the thickness of its black powder coating. Try though I did to spread it, there was no forcing it open any further. Rather than mangle the finish on the bars, I opted for a universal clutch perch from Dime City Cycles. It’s even black to match the rest of my controls. To my surprise and delight, the clutch cable was the perfect length. I even like the shorter lever. It gives me a little more cable travel, which makes for smoother shifting. Win-win. It also looks much better than the clunky OEM perch did, but I’m now left needing to relocate the choke control. That ought to be relatively straightforward though. I’m thinking I may convert to an older style pull-choke.

With cables sorted, it was time to figure out what had broken in the hand controls. Turns out it was the studded collar inside the switch housing. A third of the collar was missing, and the remaining bit had snapped in two. This part isn’t available as a separate item, so I got a bit inventive. I went down one path of actually working the part up in Google SketchUp to send it to a 3D printing service that can print objects in stainless steel. Unfortunately, SketchUp kept rounding up my input measurements, so there was no way the printed part would be precise enough to replace the original. I finally just had to buy the whole assembly off eBay. Thankfully though, I was able to find a listing where the collar was visible in the photos. $30 later, I had the part I needed and hell, the spare switch assembly may come in handy someday. Never know on these old machines.
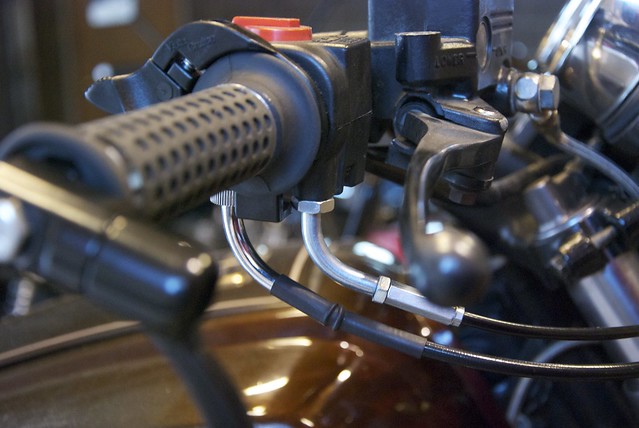
New control cables and other new pieces throughout the controls finally had my handlebars set up they way they should have been all along. My throttle now snaps back closed like it’s supposed to. The cables don’t drag on the tank now at full stop. None of the cables are dragging or pinching when the handlebars are turned. Above all else, I am proud to have finally done them right. They weren’t bad before, but they’d been done in a bit of a hurry. Now they are correct and the GL is one step closer to where I want it to be in the end. I’ve still got a long way to go, but with my garage shop set up and cooking, my list keeps getting shorter and shorter.
![]()
Okay, so now I understand why you maybe don’t want to invest in a new motorcycle. You have one *fine* looking GL1000. Those new handlebars look awesome.
Thanks man! It’s coming along. It’ll look damn good when I’m done with it. Here’s a rough Photoshop rendering:
Nathaniel,
Always enjoy your posts, even if I am still riding a Vespa. Here’s a really silly question. Love your bike, love the look of it. All except for the panel concealing most of the engine. One of the things I like about bikes is that most of the engines are beautiful works of art in and of themselves. So what was the purpose for Honda concealing most of the internal parts of this GL 1100? I don’t get it.
David
David, those engine covers are actually why I bought this particular bike. They’re not from Honda. They’re extremely rare aftermarket accessories from back in the day, and they’re my favorite part of this machine. In my opinion, they completely make the bike and they’re going to be the centerpiece of everything I do to this bike going forward.
That’s okay though. You don’t have to like them!
Nathaniel,
I have to admit, the engine panels are integrated well with the design of the cycle. You bought them for their aesthetic appeal, I understand that. I can’t deny they add a certain panache. In fact, they actually appear organic to the bike, as if they were meant to be there. I thought there may have been a mechanical or aerodynamic reason they were there, which is why I asked the question.
Hell, I should talk. I ride a Vespa — the entire damn engine is hidden. I am very much enamored with the Vespa engine, even though my mechanic and I are the only ones ever to see it. I think the engine is beautiful. But I would never remove the engine cowling of a Vespa, much as I would love to display the engine. Like your bike, that cowling is integral to the Vespa. Strip it away and, well, it just isn’t a Vespa.
I hope your bike does not hold my comments against me.
David
No worries, David. You’re not going to hurt my feelings one bit. No one need like it but me. I’m generally in the minority on the engine covers. The GL has a terrific engine that’s definitely worth showing off. These were just too good to pass up on.